How to Edit your Photos
By Mick Bajcar
AirHistory.net is an aircraft photographic database. Photos are assessed before being added to the database and they should always be submitted at their best quality. Photos that a reviewer feels could or should be better may not be added to the database. To achieve this, a degree of digital editing is needed whether that is from scanned prints, negatives, transparencies or digital photos. Old and faded photos can often be recovered to a remarkable degree using these methods.
This guide is intended to demonstrate the basic techniques involved in such editing which will relate to editing reasonably well exposed photos. For the purpose of this tutorial the starting point is a jpg (also known as a jpeg) photo file as these are required for uploading to AirHistory.net. A jpg file is by far the commonest way of sharing photos on the internet and it is produced by most digital cameras and can be produced by scanners. File sizes are smaller and more manageable than other formats without dramatic loss of quality.
Editing jpg files is however a destructive process with a small loss of non-reversible quality every time the file is edited and saved. Many digital cameras can save RAW files which need to be converted to jpg before photo editing. RAW files can be edited without loss of quality and with reversible changes. The maximum file size allowed for AirHistory.net is 2 MB. Scanning will be dealt with in a separate document.
Some form of editing programme is needed, the best known of which is Adobe Photoshop which is available in several forms, including Lightroom and Photoshop Elements which is the simplest and cheapest. There are also programmes from GIMP (which is free) and Corel that you may wish to try but all references in this guide will be to Photoshop. The symbol ➤ will be used for 'go to'.
It is a good idea to ensure that your monitor is calibrated. There are some very sophisticated (and expensive) ways of doing this though for most of us there are free tools and a good guide can be found at the excellent Cambridge in Colour website.
Cropping, levelling and resizing
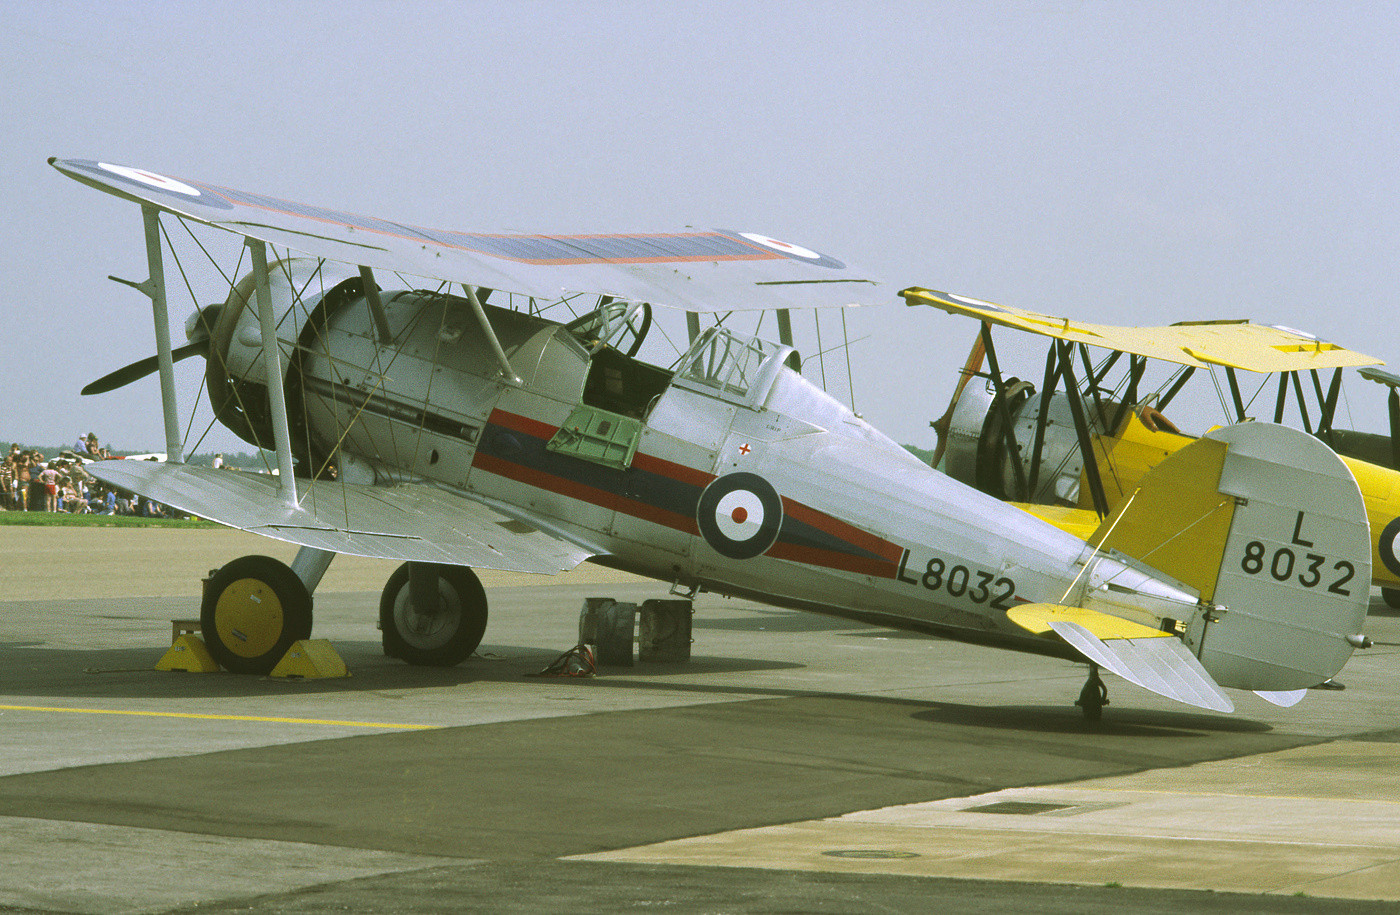
This photo will be used as a demonstration and this is how it appeared 'out of camera'.
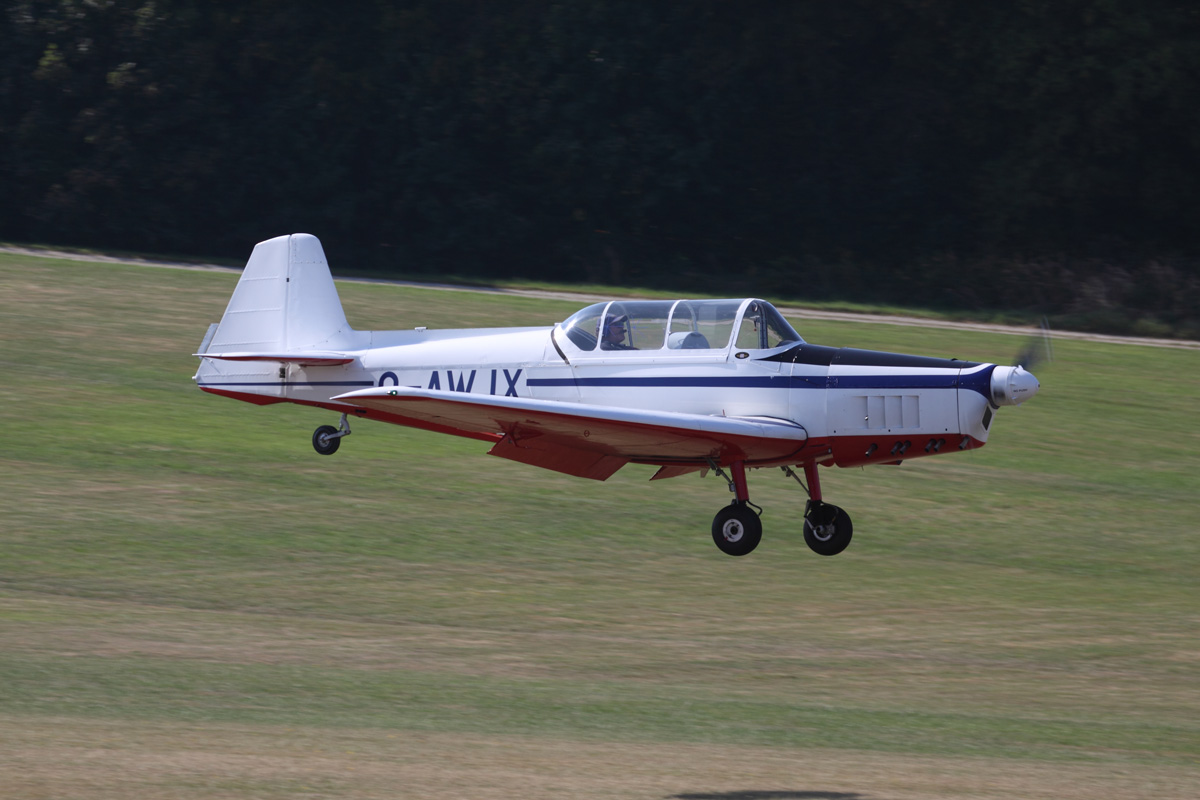
Our example photo, straight out of the camera
As can be seen, the photo is sharp but it is a little small in the frame and it appears to be landing on quite a steep slope. It is very simple to correct these issues and there is no reason that an photo should be submitted this way simply because that was how it appeared out of the camera. When photos are screened it is impossible for those who are doing the screening to know every location so it is important to ensure that photos appear or 'feel' level and for this reason the longest vertical or horizontal line close to the centre of the photo usually gives the best result. Here the 'grass horizon' clearly shows that the level needs to be corrected, it needs to be cropped tighter and as the file size from the camera is about 6Mb that needs reducing too. Much of this can all be done in one fell swoop.
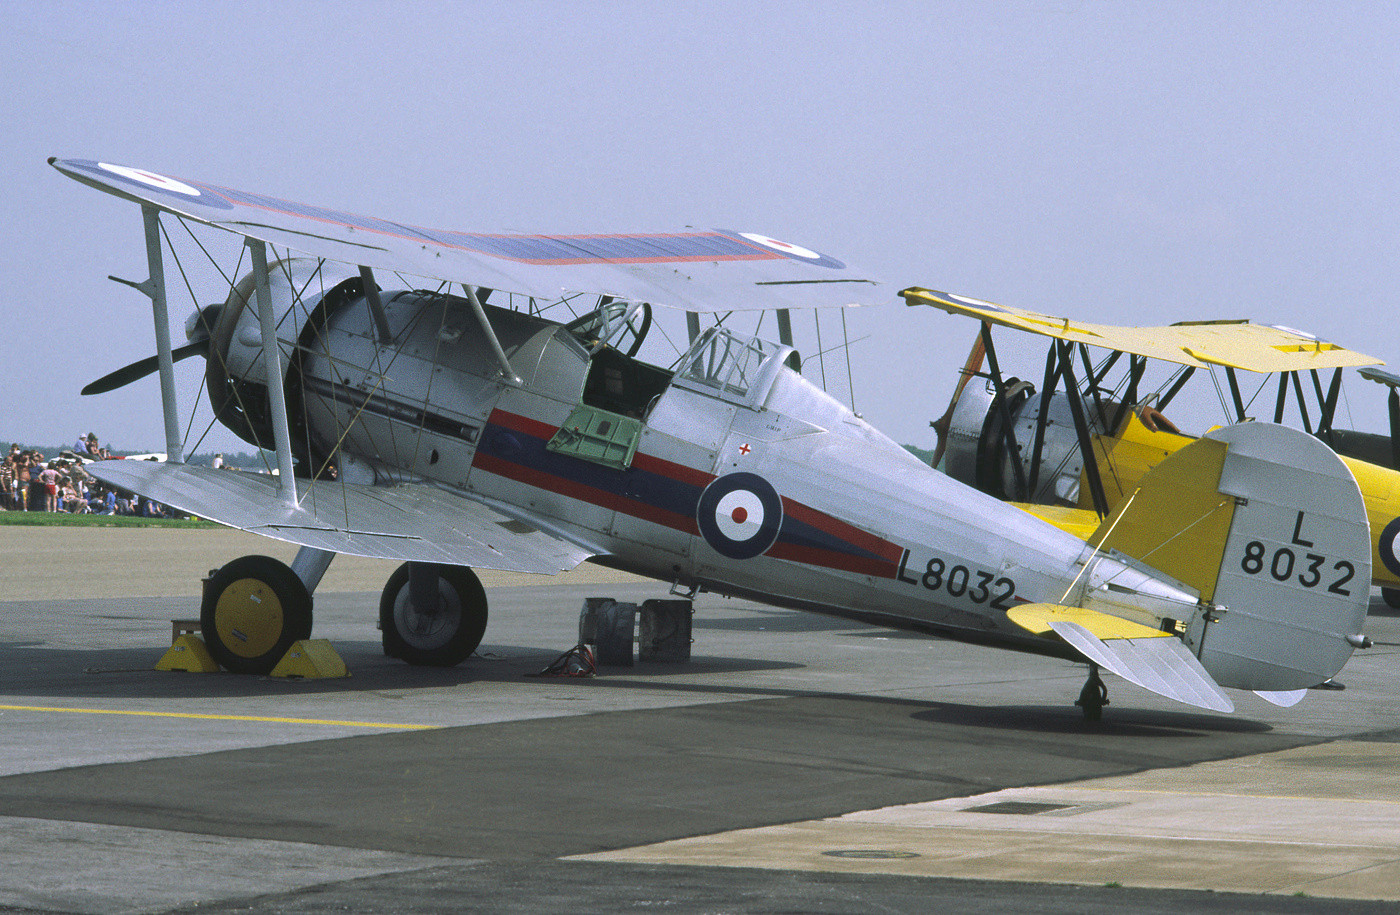
From the toolbar on the left, select the crop tool (red arrow) and create a frame, cropping the photo closer. Go to the corner of that frame, hold the mouse button down and rotate the frame so that the 'grass horizon' is level. Double click inside the frame and the photo will now be cropped tighter and levelled. Go to Image ➤ Image size and set the width at a suggested 1200 pixels and this should ensure that most photos will be under 1Mb in size when the editing is complete. The aircraft is now cropped closer, it appears level and it is reasonably well centred in the frame.
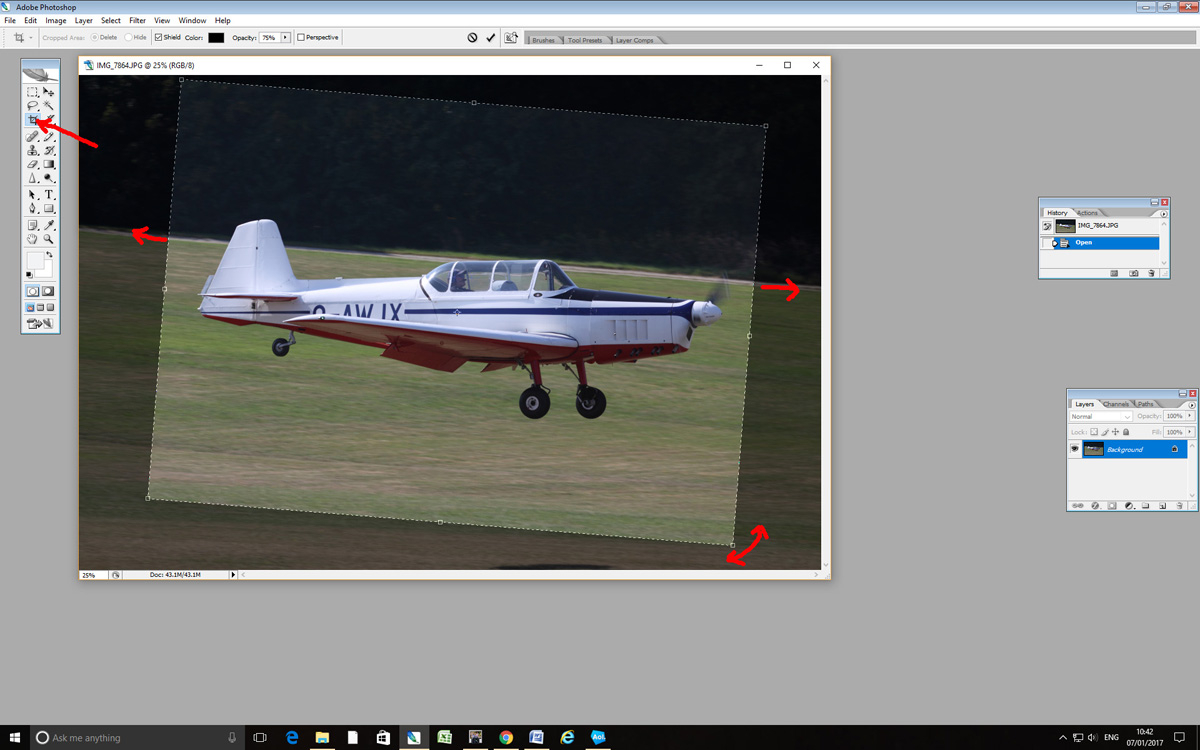
Levelling and cropping the photo using the Crop tool
Exposure and contrast (levels)
Though this cropped photo is well exposed it now needs the contrast and exposure adjusting slightly. There are very simple tools, Image ➤ Adjustments ➤ Brightness and contrast, but what is more effective is to use the Levels. Go to Image ➤ Adjustments ➤ Levels and the graph (known as a histogram) as shown will open. Below the histogram there are three upward pointing arrows and these set, from left to right, the black, mid-tone and white points.
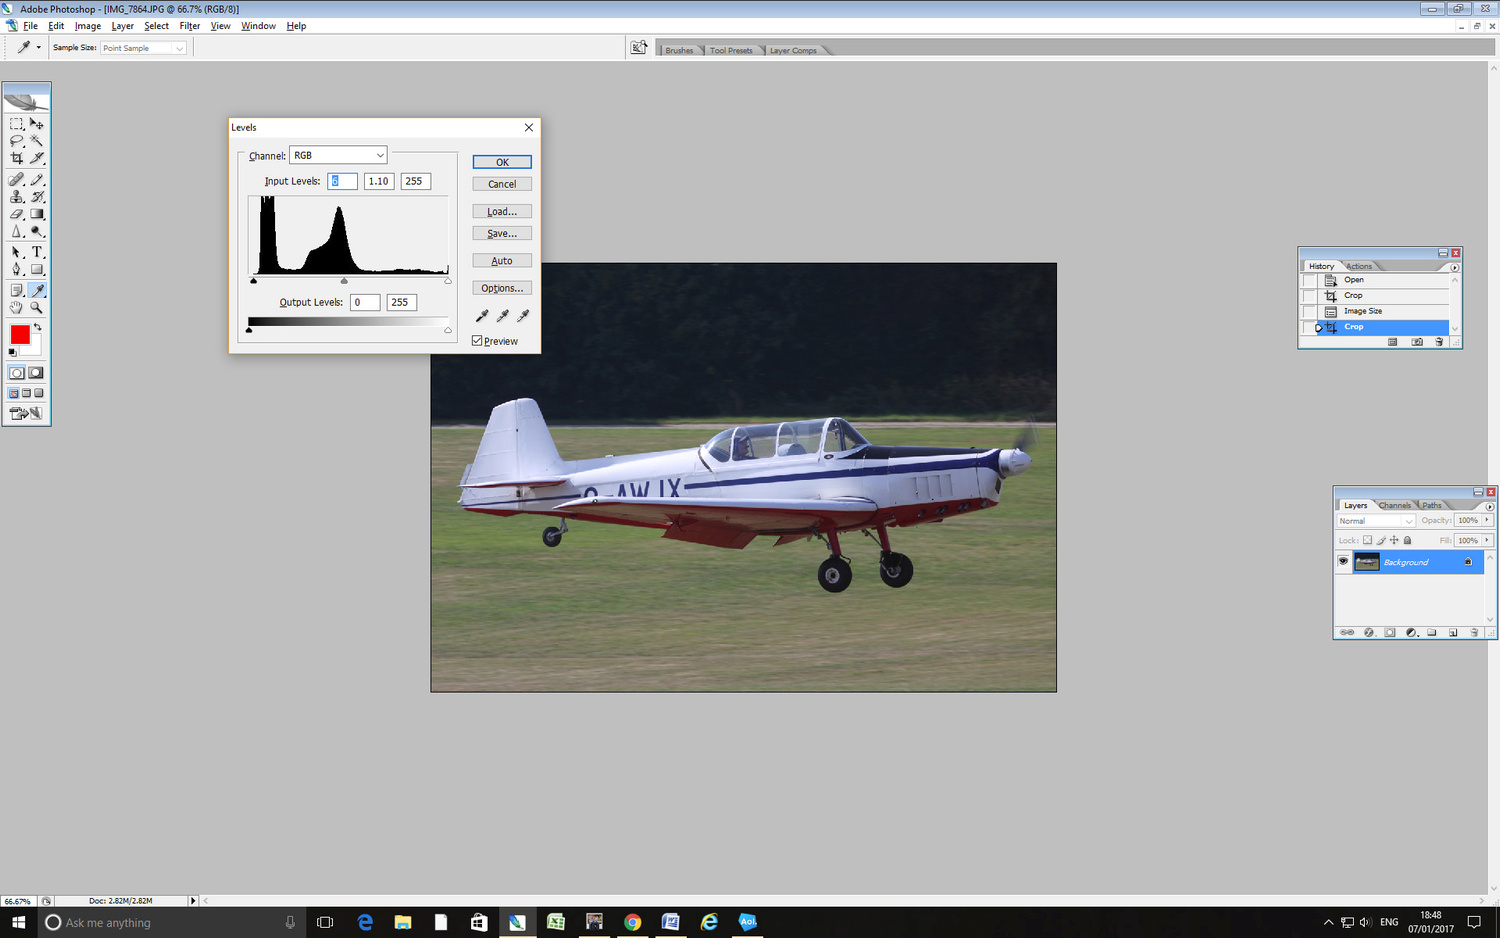
Optimising exposure and contrast using the Levels dialog
Most photos look best with a full range of tones from a deep black to a clean white and any peaks indicate a preponderance of a particular tone. The one used in this example shows the large dark background area. For further reading, an excellent tutorial is again to be found at the Cambridge in Colour website.
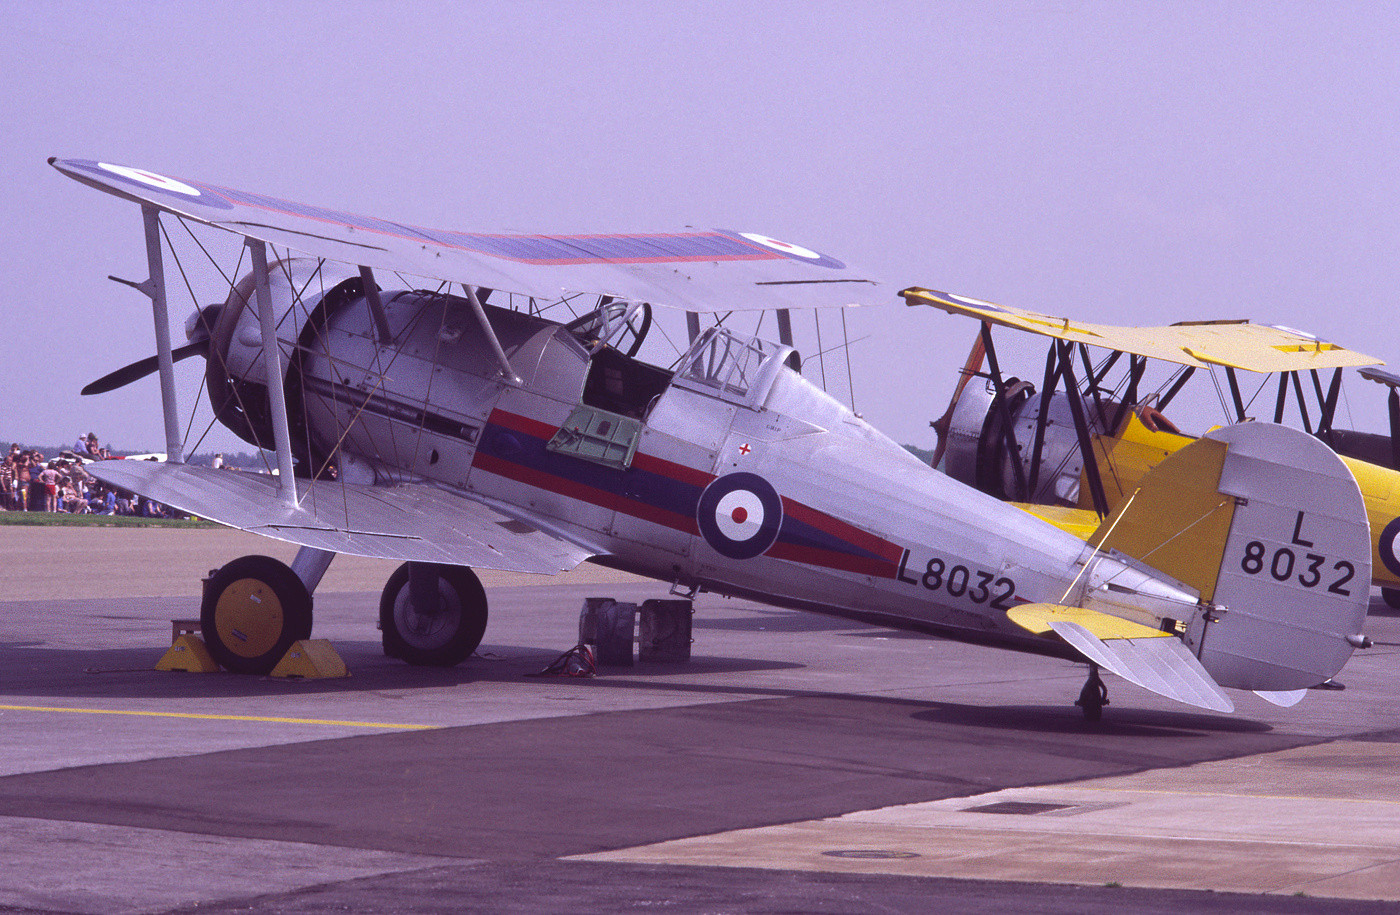
The shadow highlight tool is available in most versions of editing programmes and this lightens shadows and darkens highlights. Anything other than very minor use leads to flat, unnatural looking photos with noisy (grainy) shadows. Aircraft in the sky can also show 'halos' around them and its use is best avoided. The example below is deliberately extreme to exaggerate the effect, a dark aircraft that has been considerably lightened. Use of the curves, if it is available as part of your Photoshop package, is less intuitive but the effects are far more controlled and subtle and particularly useful with scans. There is a superb tutorial on the Golden Mean website.

A light halo surrounding the aircraft, due to improper use of the shadow highlight tool
It should be noted that this function is available in many digital cameras, known as Highlight priority in Canon SLR cameras and Active D in Nikon cameras. In the simplest of Nikons this is the default setting which is best disabled. Aircraft in the sky seem to be a particularly bad subject for this function, especially with regards to the halos described above, often as a dark halo around the aircraft.
Colour casts and colour saturation
A colour cast is an unwanted tint of a specific colour across the photo. It can be corrected using photo editing software by adding the opposite colour to the cast. This requires practice and the ability to recognise the cast. By far the commonest cast with scans is magenta, a blue-red which is corrected by neutralising it by adding green. If you intend to make scans of transparencies or prints, it is very important to be able to recognise that particular cast and how to correct, to neutralise it. To correct a blue cast, add yellow or a cyan cast (blue-green) add red. The aim should be for mid-tone grey to be neutral.
Magenta cast - correct with green

Cyan cast - correct with red
Yellow cast - correct with blue
No cast (neutral)
In Photoshop you can use Ctrl + B to make changes or Image ➤ Adjustments ➤ Colour balance. Again, Levels can be used. In the example above for optimising exposure and contrast, where the Levels histogram is open, there are three eyedroppers, the centre of which is grey so click that, then click on an area that should be grey. If that does not give the desired neutral colour, go back and try another spot. If there is a very strong cast, Image ➤ Adjustments ➤ Auto colour can often be effective. After this try Edit ➤ Fade as this frequently offers a subtle necessary change.
Oversaturated
Normal saturation
Saturation is the strength of the colours and some editors equate strong colours with a good photo and saturate to the point that, in particular reds and greens become unnatural, almost 'hurting the eyes'. Whilst strong colours can be effective in providing strong prints, for internet uses more muted colours are most effective. Increased saturation does also come with a disadvantage in the form of noise in oversaturated areas. Increased saturation also exaggerates any colour casts.
Dust and scratches
Pre digital photos, scans, are prone to suffering from dust and scratches and these can be removed using the clone tool. Select an area close to the dust spot and a radius sufficient to cover it and clone over the dust spot. Cloning is only acceptable at AirHistory.net for the removal of such blemishes. Digital photos can also suffer from dust spots, dark blobs which are evident in even areas such as the sky, and these should be dealt with in the same way. This will later be discussed further in an advanced section.
Sharpening
Most digital photos benefit from sharpening. This is a technique that involves adding contrast to any edges thereby making an photo appear sharper. If sharpening is not applied a digital photo is likely to appear soft, very slightly 'out of focus' or with slightly 'fuzzy edges'. Most cameras apply some form of sharpening in camera, the lower end ones applying the most but photos benefit from a little extra in editing.
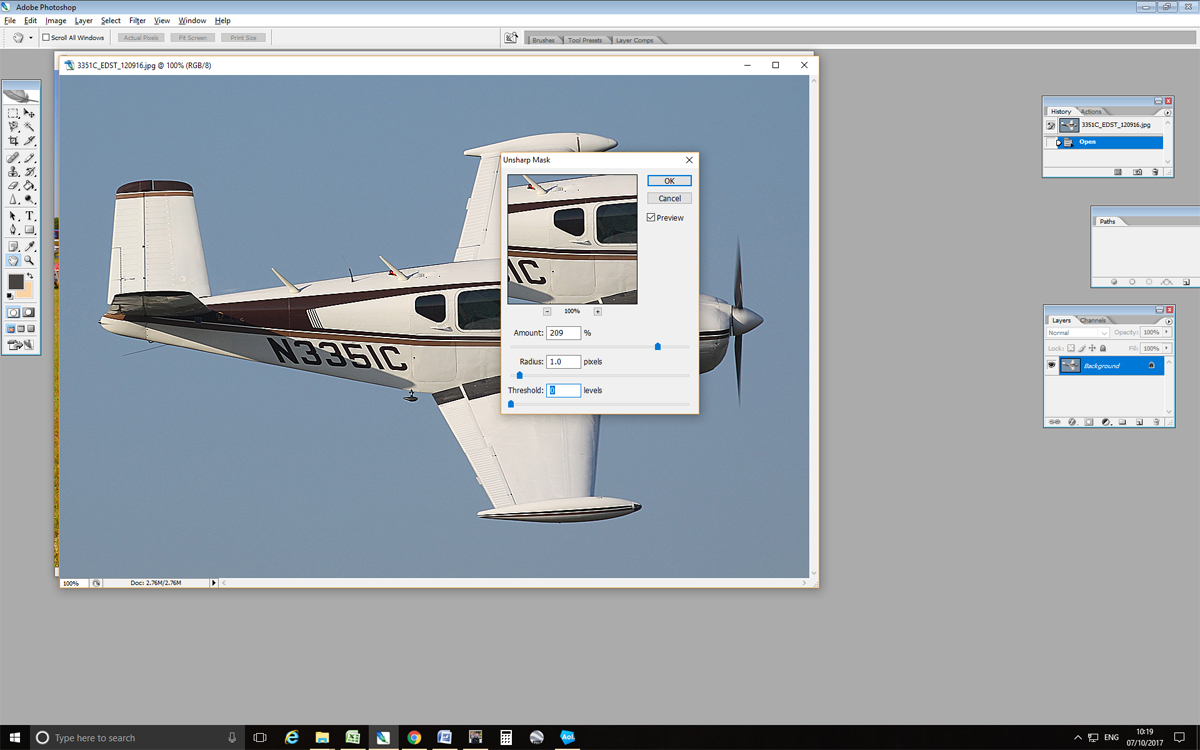
Sharpening the photo using the Unsharp Mask dialog
The simplest editing programmes use a technique called Unsharp Masking, a technique that actually has its origins in the infancy of photography. USM can be applied by going to Filter ➤ Unsharp Mask and a normal setting is around 200-300% at a radius of 0.3. The photo below was given 200% at a radius of 1 pix and you will see that the cheat lines have taken on a very jagged appearance, a classic sign of overshapening. Some experimentation is suggested in this aspect to evolve your own techniques.
The art of sharpening is to get the photo to appear sharp without those jagged lines. The more advanced editing programmes have a sytem known as Smart sharpen and this tends to be applied at lower levels, 100% at 0.3 being a good starting point. Different levels of sharpening can be applied to highlight and shadow areas using Smart Sharpen, a far more sophisticated system. Scanned photos, slides or prints will usually take a little more sharpening than digital photos.
Saving the photo
The original digital file can be looked on as the original negative or transparency and so this should be saved unaltered – you may wish for a larger file or a different edit in the future. Create a new file name that helps you to recognise what is on a file by its name reigstration-date-type-location-initials is one way to do things but you can develop your own method of doing this. Go to File ➤ Save As and a dialogue box will appear for the file name and then you will be asked about how to save the photo quality. Always save it at the highest quality that gives a file size below 2 MB (for AirHistory.net use). At the recommended submission size of 1600 pixels wide, most photos will be well below this size.
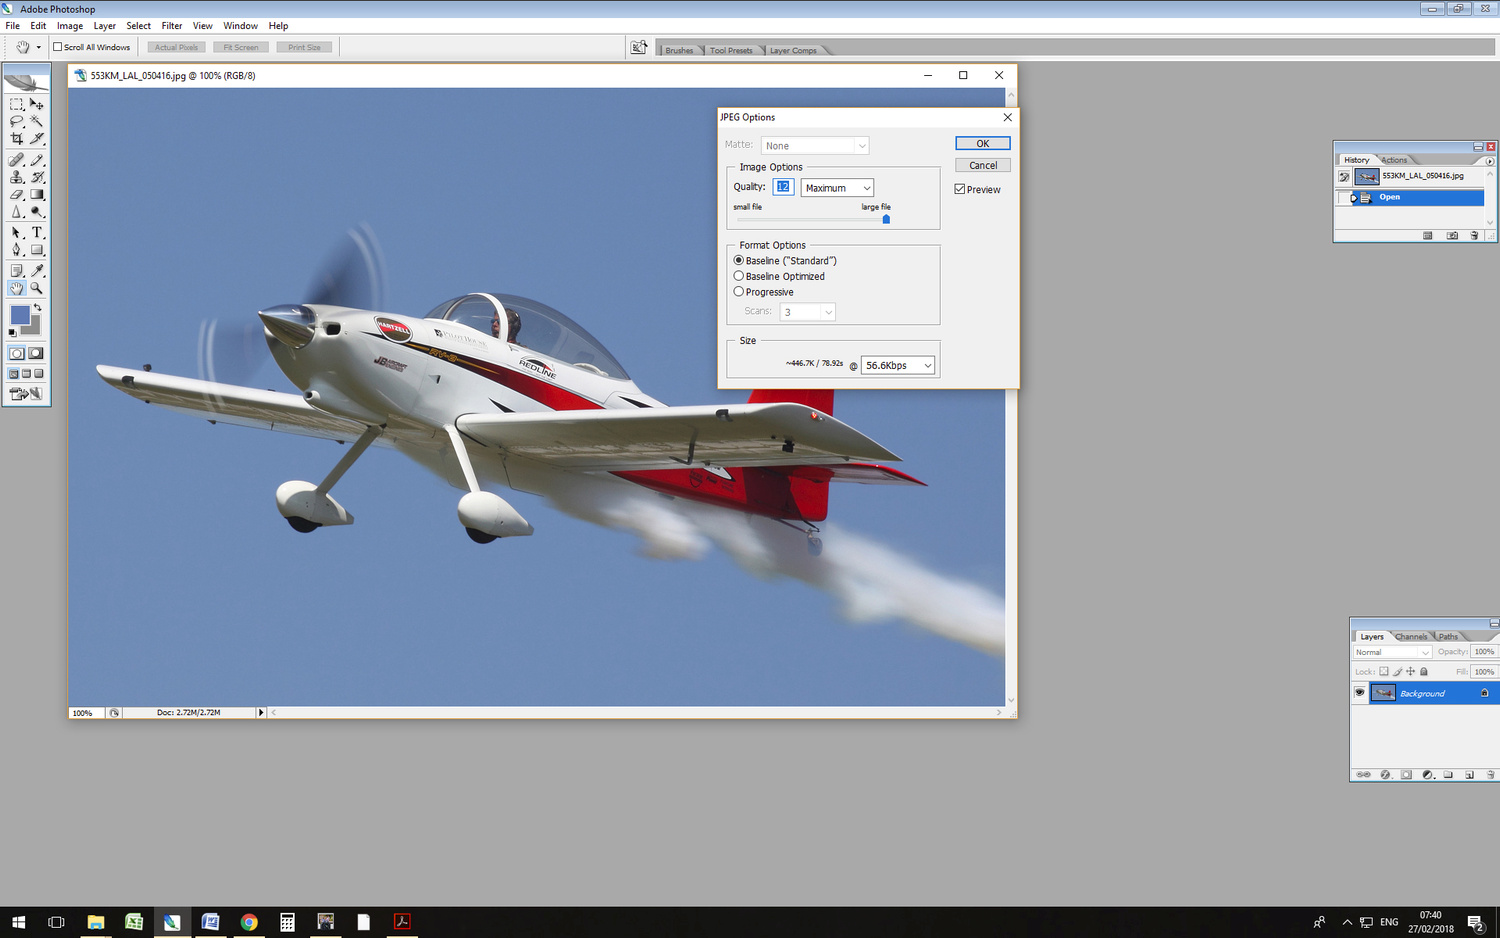
Saving the photo as a jpeg file, ready for uploading to AirHistory.net
It must be emphasised that the above is a very basic guide to editing and much more is possible. As daunting as the above may seem, it very quickly becomes second nature.
Random Picks


